Spiderpipe - PayPal
There are several steps to connect your PayPal account to Terminal3 Payments.
Create a paypal merchant account
In order to set up a PayPal payment method, a PayPal account needs to be created. Please make sure that your PayPal account matches the following criterias.
-
The account type should be BUSINESS.
-
The account status must be verified.
-
The linked credit card(s) should be confirmed.
-
You should be able to receive payments in your country.
Configure IPN listener and callback url
-
Log in to your PayPal account.
-
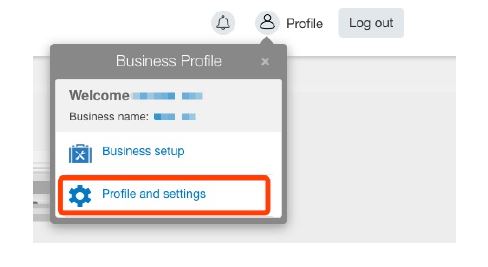
Click on your account icon.

- Click Profile and Settings on the popup menu.
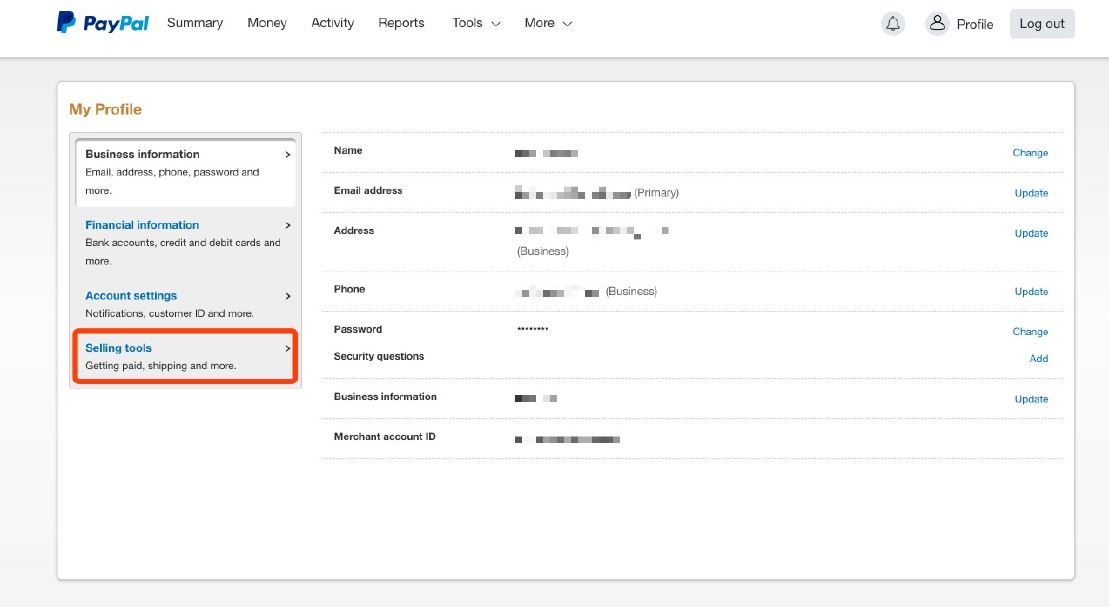
- Select Selling Tools.
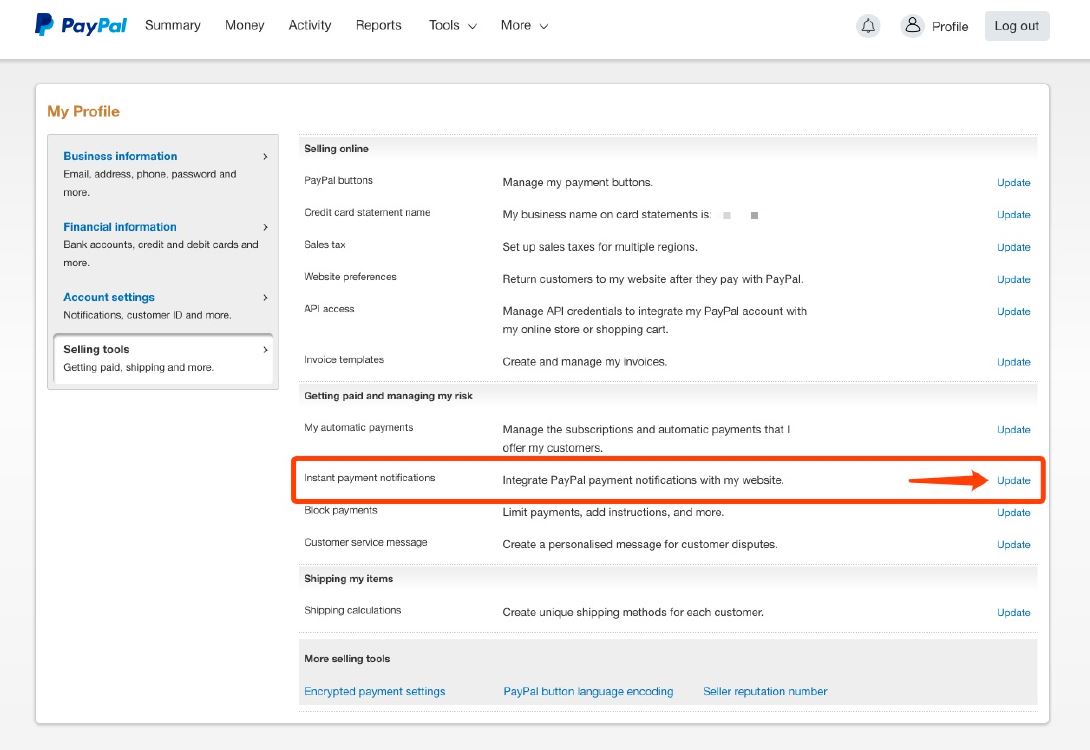
- Find Instant Payment Notifications on the menu and click on Update
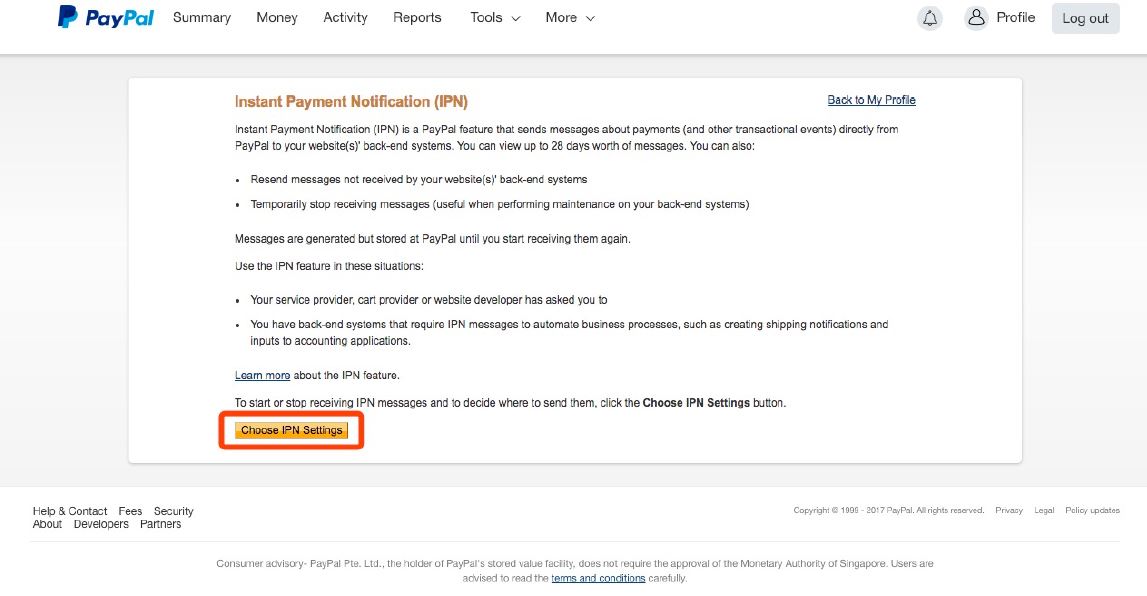
- Click Choose IPN Settings to specify your listener’s URL and activate the listener.
- Specify the URL for your listener in the Notification URL field and check Receive IPN messages (Enabled) to enable your listener.
https://payments.terminal3.com/api/paymentpingback/paypal
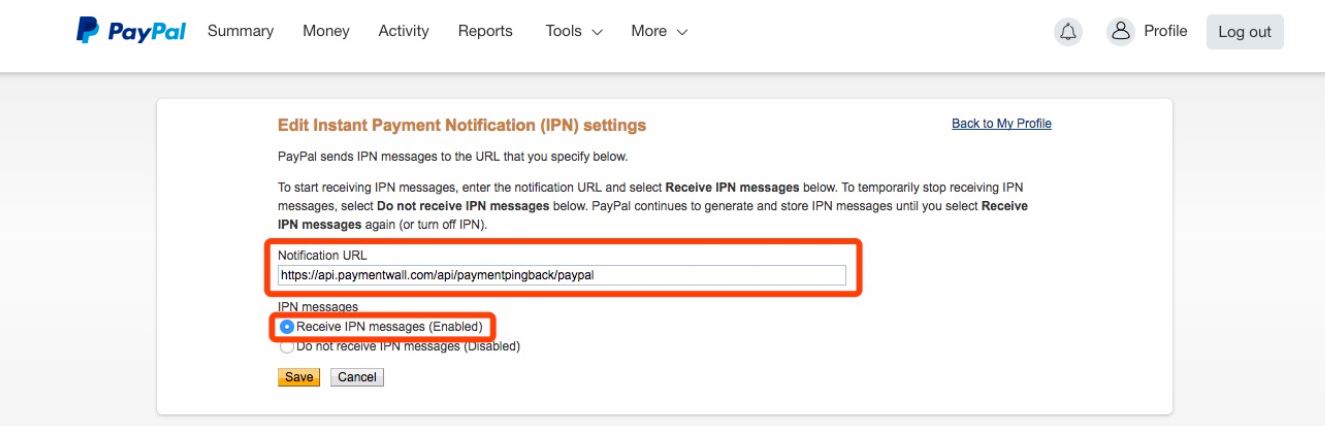
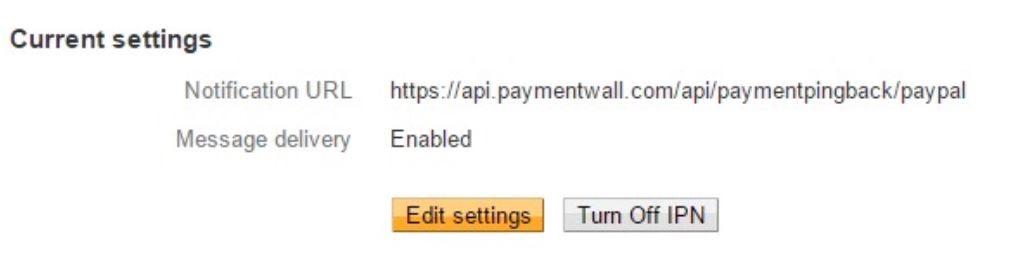
- Click Save and below screen should appear which shows your current settings:.
Configure your payment receiving preferences
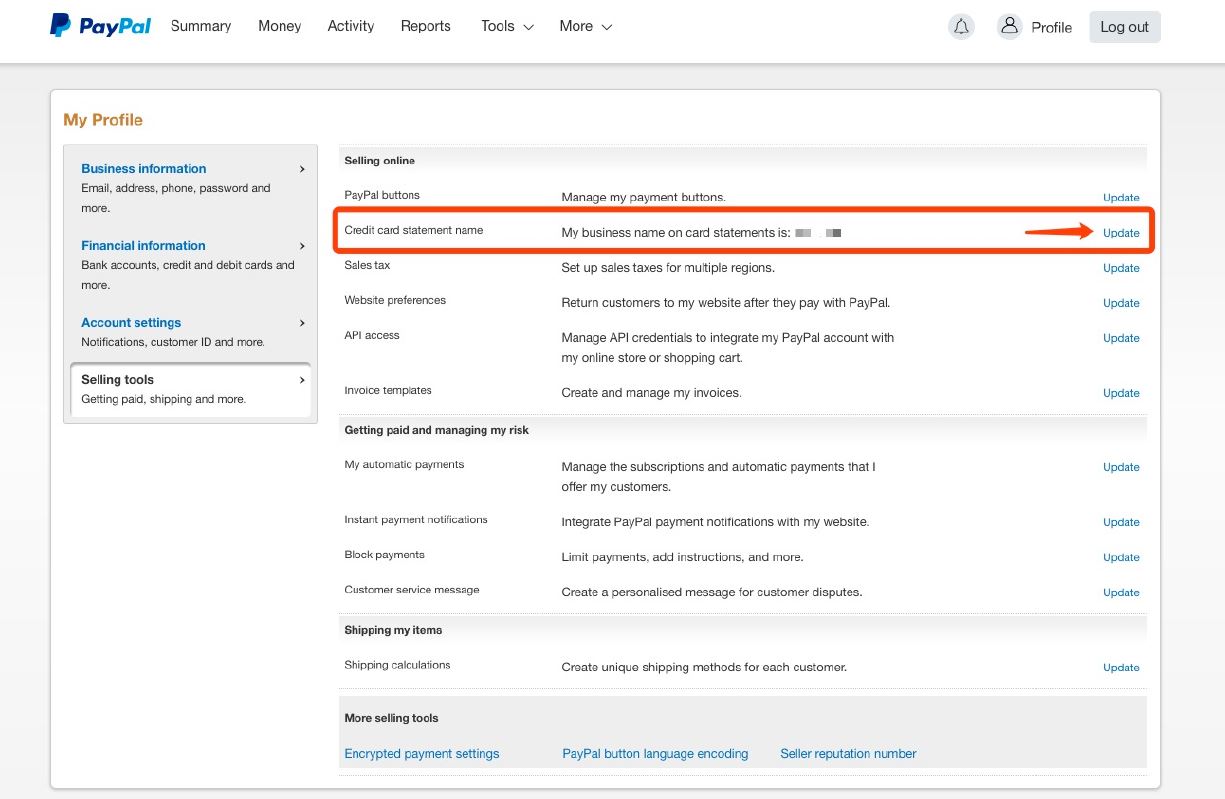
- Click on the Profile Settings tab on your account.
- Select Selling Tools. Find Card Card statement name in the opened menu and press Update.
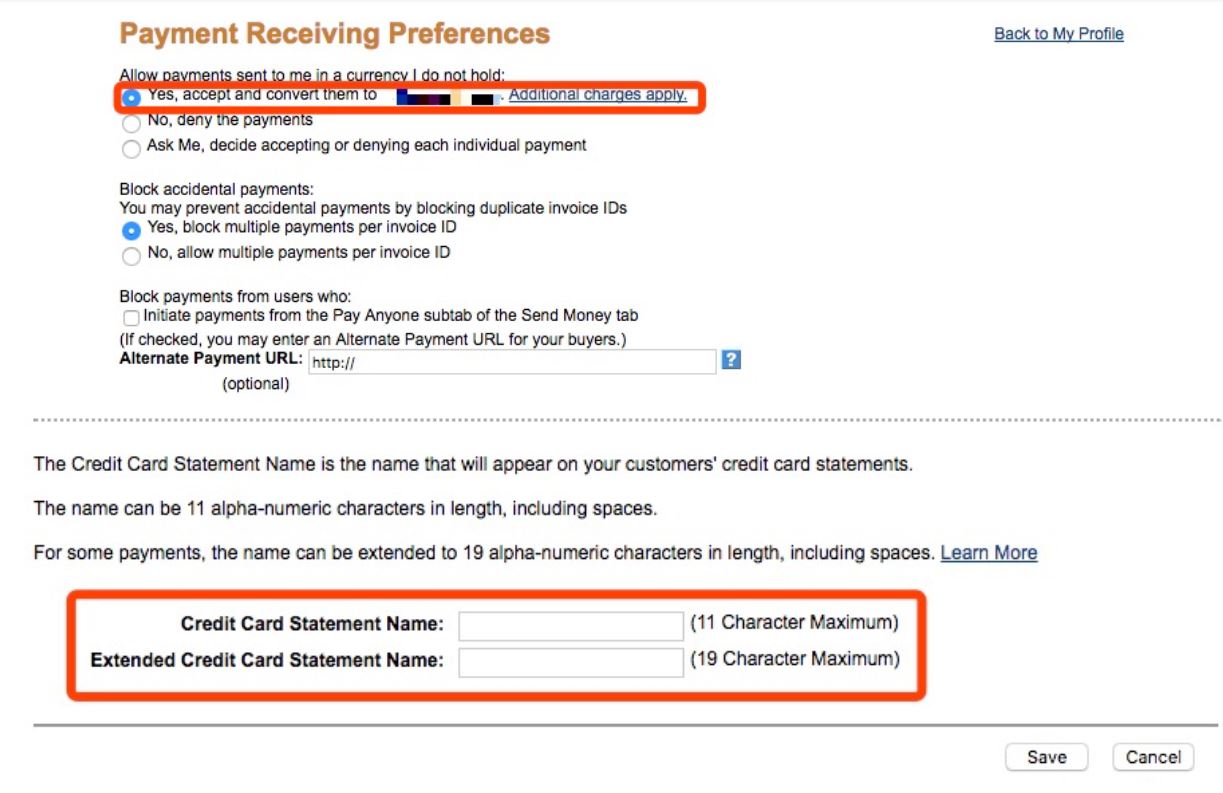
- In Payment Receiving Preference page, check the Yes, accept them and convert them to… option under the Allow payments sent to me in a currency I do not hold section. Fill in Credit Card Statement Name and Extended Credit Card Statement Name and click Save.
Add your PayPal merchant account
- Log in to your Terminal3 Payments Merchant Area and click Account Settings on the menu.
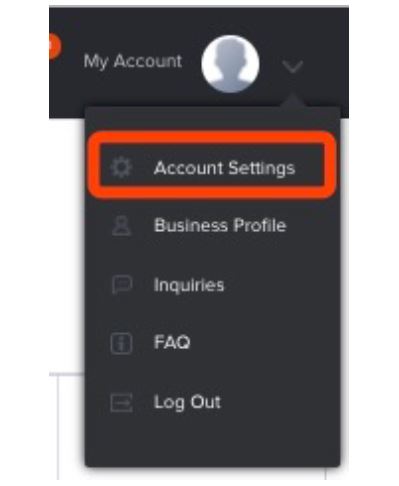
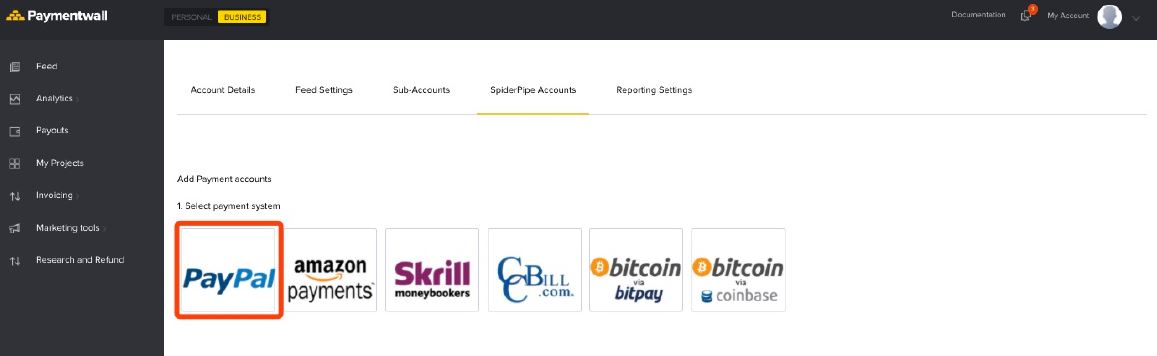
- Choose SpiderPipe Accounts section under Settings and click on Add Payment Account button.

- Select PayPal as the payment system.
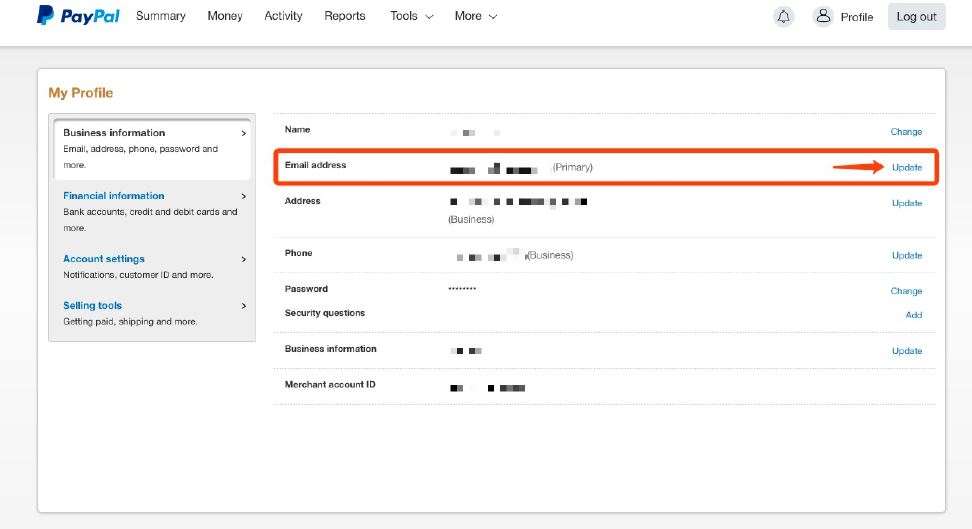
- Enter your primary email address.
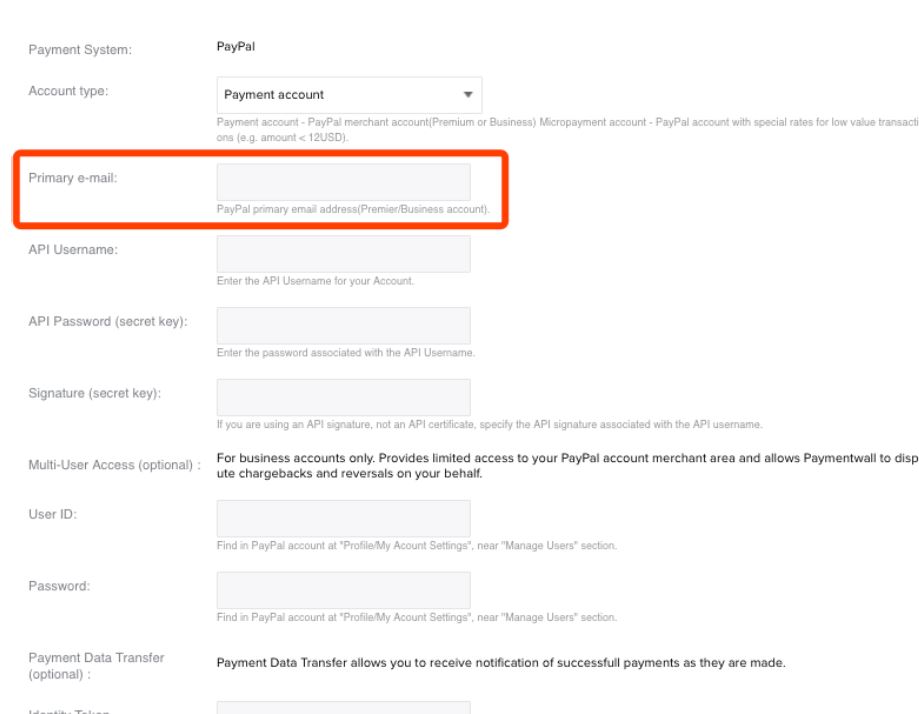
The primary email address could be found at My Business Information tab in your PayPal account. You may also change it by clicking Update.
- Enter your API credentials and signature from your PayPal account.
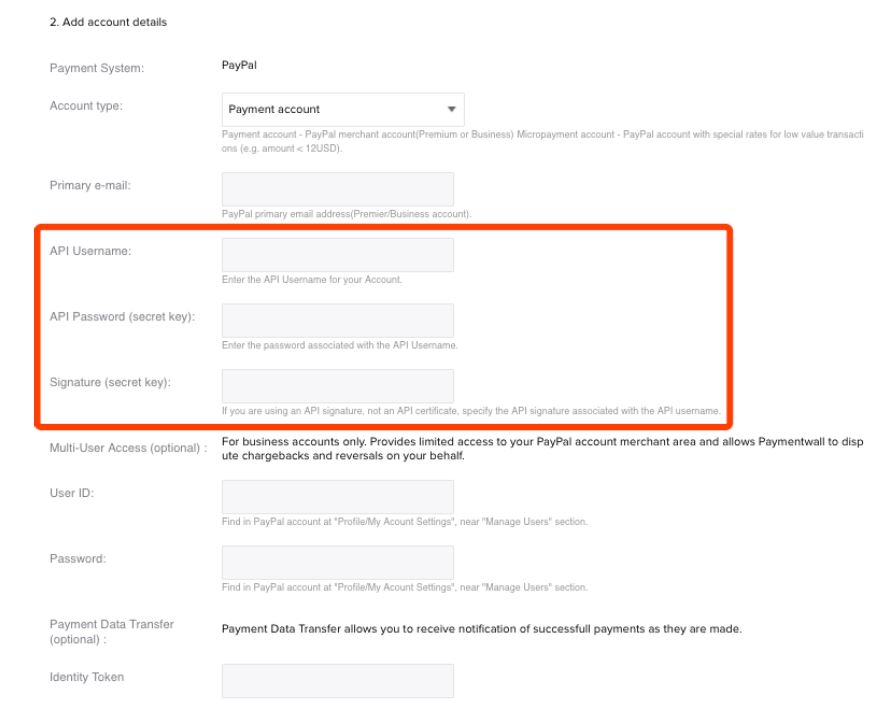
Click here to obtain your API credentials. On the opening website, click Request API Credentials on the API Access page.
Select Request API signature and click Agree and Submit to generate a set of Signature credentials and click Save.
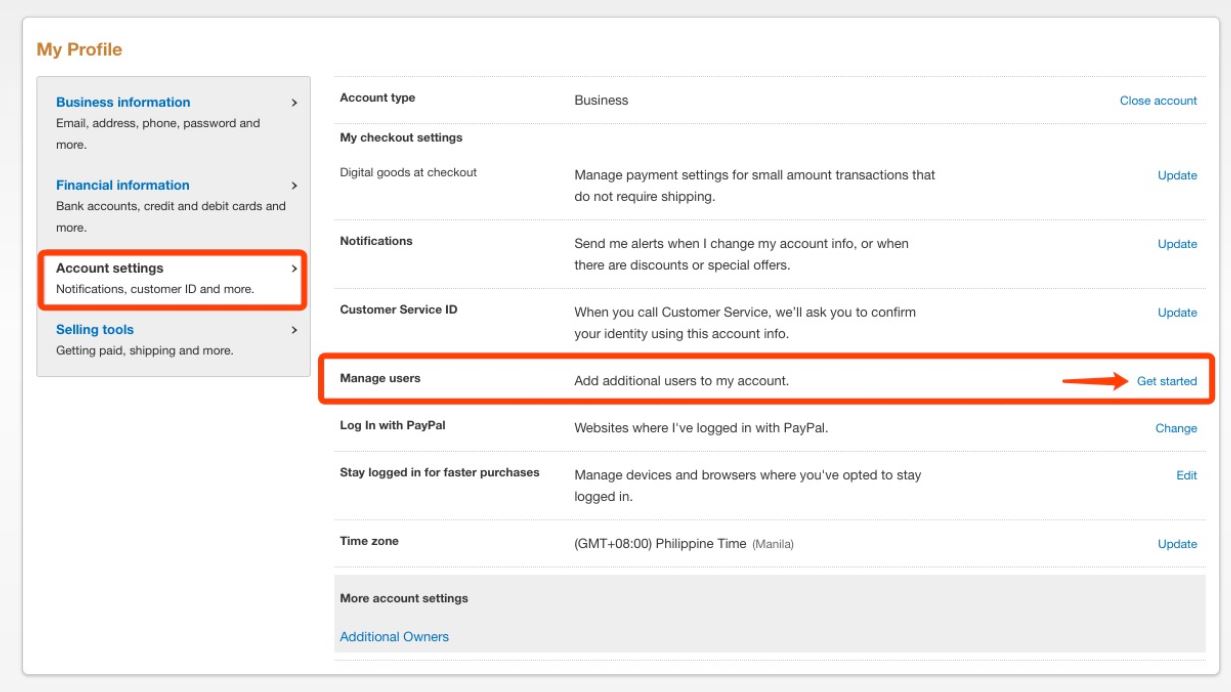
Multi-user access
-
Log in to your PayPal account and go to your profile page.
-
Select Account Settings and click on the Get Started button under the Manage Users tab.
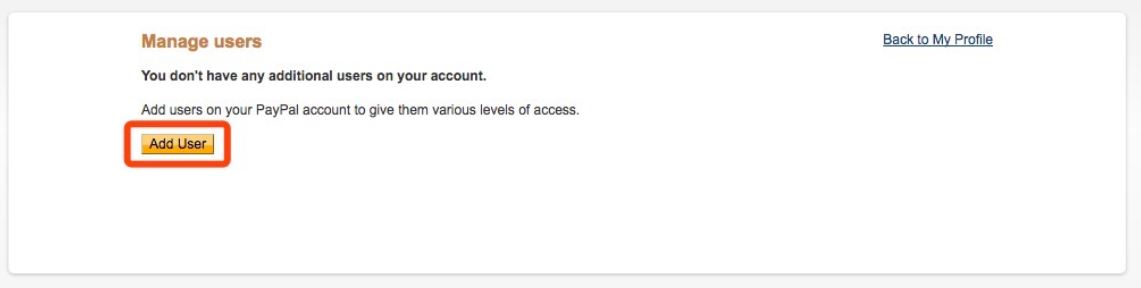
- Click Add User.
- Fill in the User’s settings, User’s first and last name should be set as
Admin Terminal3 Payments.
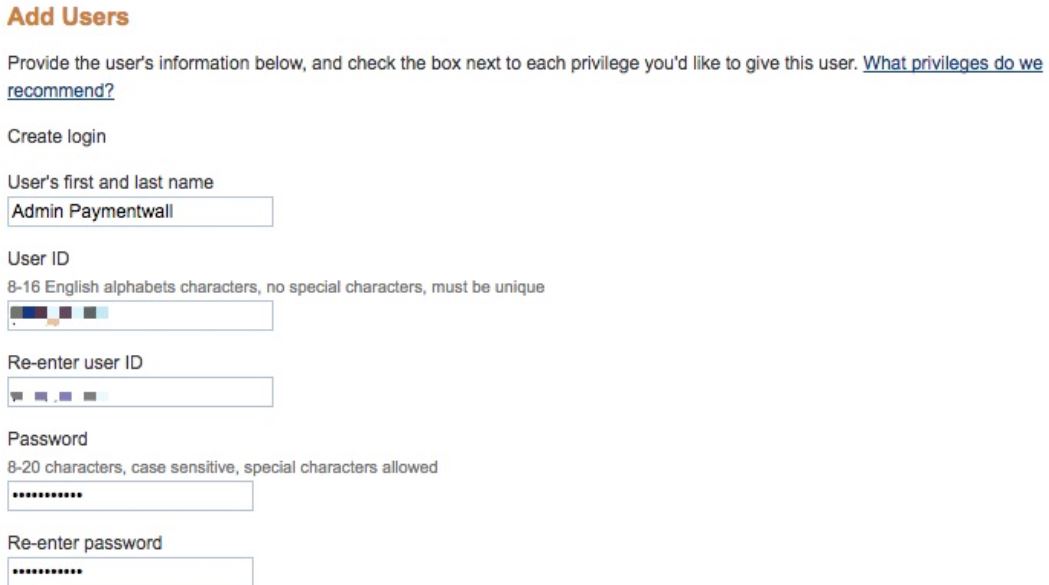
Enter custom User ID and Password (shared with Terminal3 Payments).
These credentials should be entered to the PayPal account setting at Terminal3 Payments (Multi-User Access section – User ID and Password textfields).
- Assign access.
In Accounting section, check Refunds, Cancel Payments and Recurring Payments.
In Administration section, check View Profile.
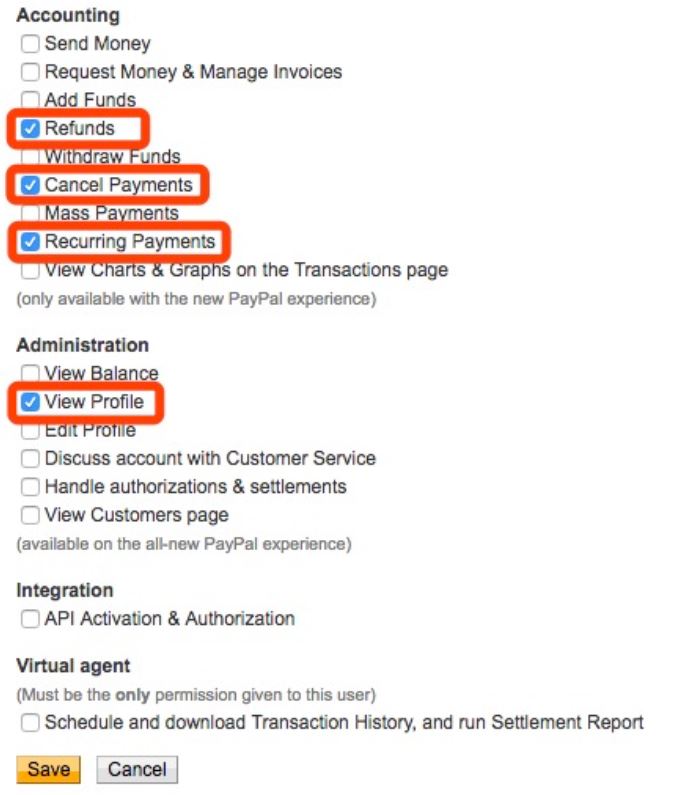
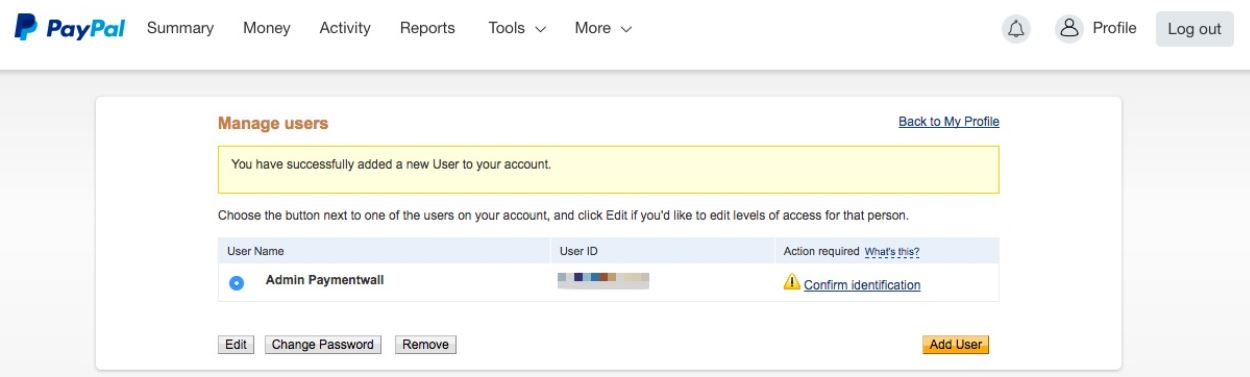
- Click on the Save button and confirm the sub account created, you should see below screenshot as confirmation.
Payment data transfer
-
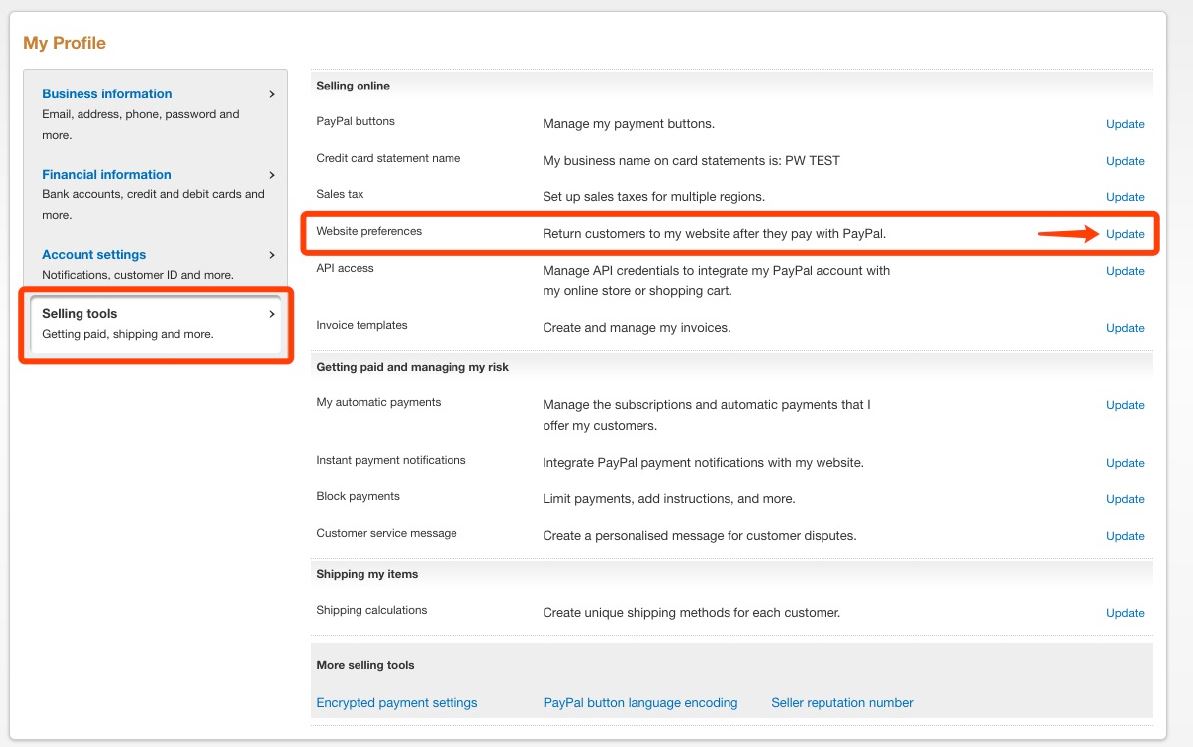
Go to the Profile and Settings tab on your PayPal account.
-
In the Selling Tools tab, click on Update under the Website Preferences option.
- Set both Auto Return and Payment Data Transfer (optional) to ON. Save your settings and go back to the Website Payment Preferences page.
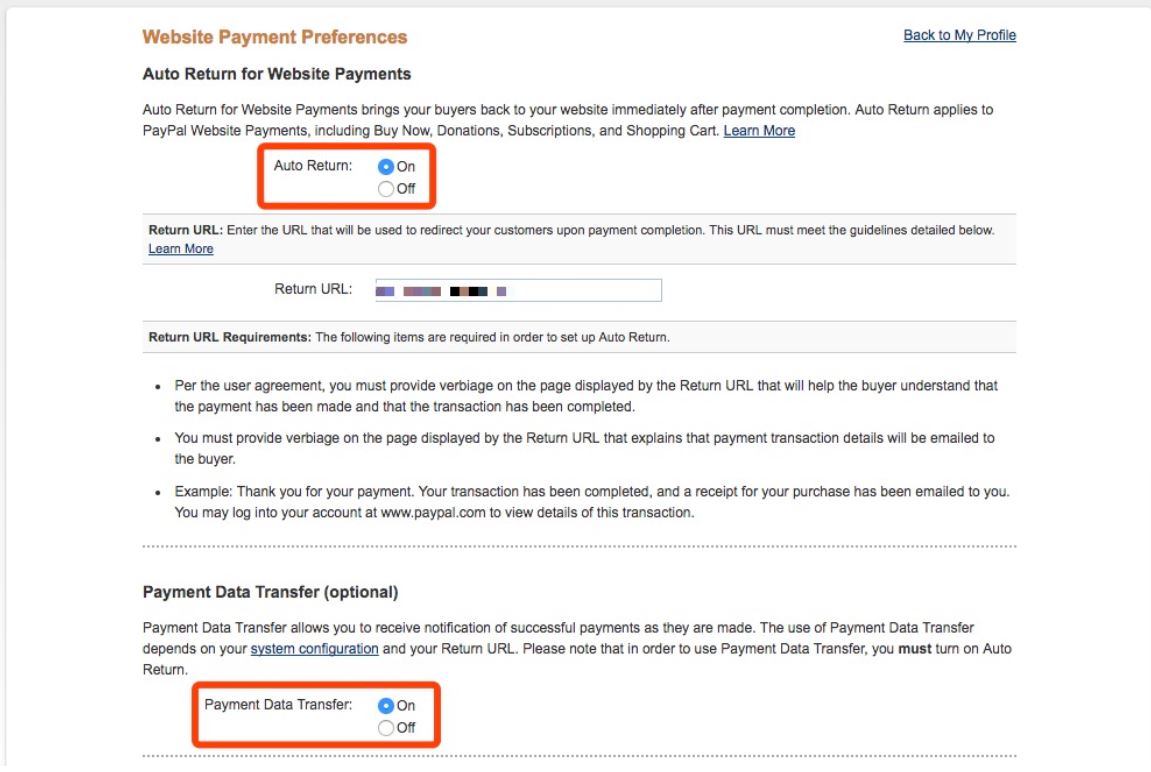
- You can see that an Identity Token has been created. Paste this on Terminal3 Payments side inside “Identity Token” section.

Next Step
Congratulations!
Now you can start monitoring your PayPal payments with your Terminal3 Payments account!