Widget API
Widget is a payment page hosted by Terminal3 Payments where users complete all the steps of the payment process: selecting the payment method, selecting the price point/product and completing the payment. The price points are configured via Terminal3 Payments Merchant Area.
For Offerwall Widgets, see Offerwall Integration.
Payment Widget Flow
Here’s how a payment widget flow looks like for All Payment Methods:
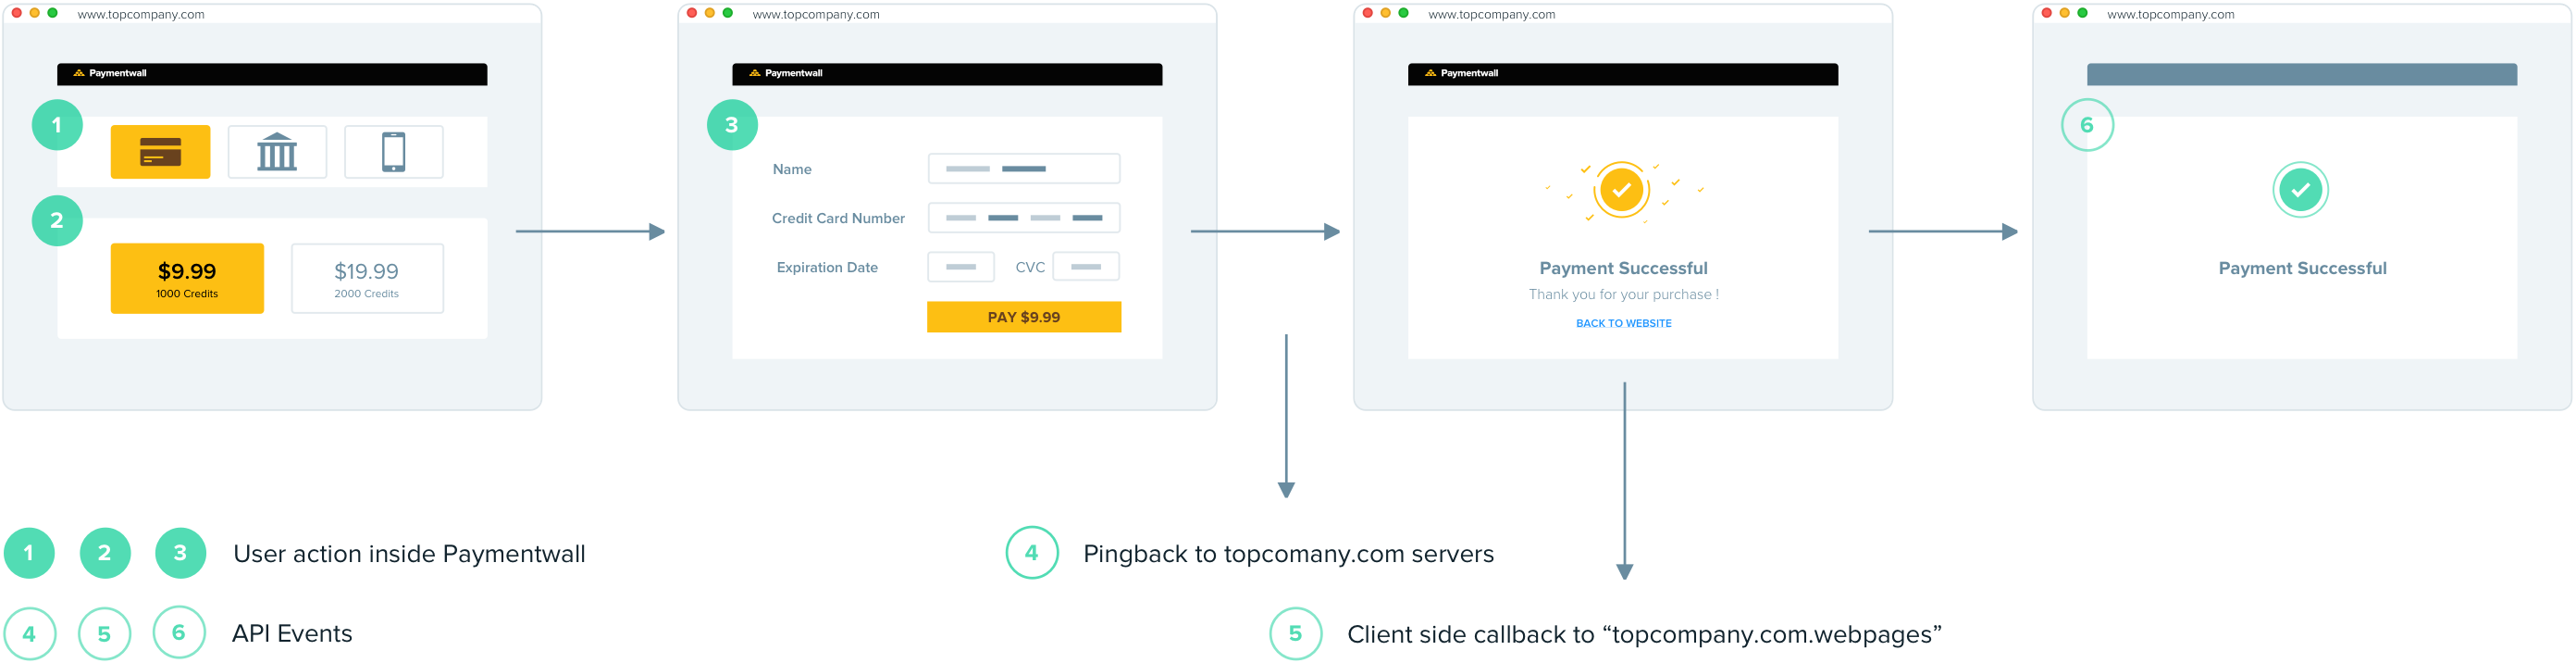
Steps:
- User selects one of the available payment methods.
The methods are automatically geo-targeted based on the IP address. Users from Brazil will only see Brazilian payment methods. Merchants can configure the list of active methods in Terminal3 Payments Merchant Area. More about Payment Methods. To show only one payment method, see Single Payment Method. - The user selects one of the available price points. If you want to pass a specific price from your system, please refer to Checkout API instead.
The price points can be:- Virtual Currency packages such as 100 Credits, 200 Credits.
For some specific methods, such as Mobiamo (Mobile Carrier Billing), Terminal3 Payments will automatically calculate the amount of Credits based on the prices that operators support in that country. For example 120 Credits for 1 EUR, 240 Credits for 2 EUR. - Digital Goods, for example:
- one-time products, such as Lifetime License, Extended Lifetime License
- subscription packages, such as Monthly Basic Subscription, Monthly Premium Subscription
- Virtual Currency packages such as 100 Credits, 200 Credits.
- User completes the purchase.
- Terminal3 Payments sends a pingback - server-side payment notification to the merchant.
- The widget page sends a client-side callback to the parent window (if used via iframe).
- Terminal3 Payments redirects the user to the success page.
Single Payment Method
If you would like to skip step 1 and pre-define the Single Payment Method (e.g. only credit cards), you can pass API parameter ps=$method_name and the widget will look like this:
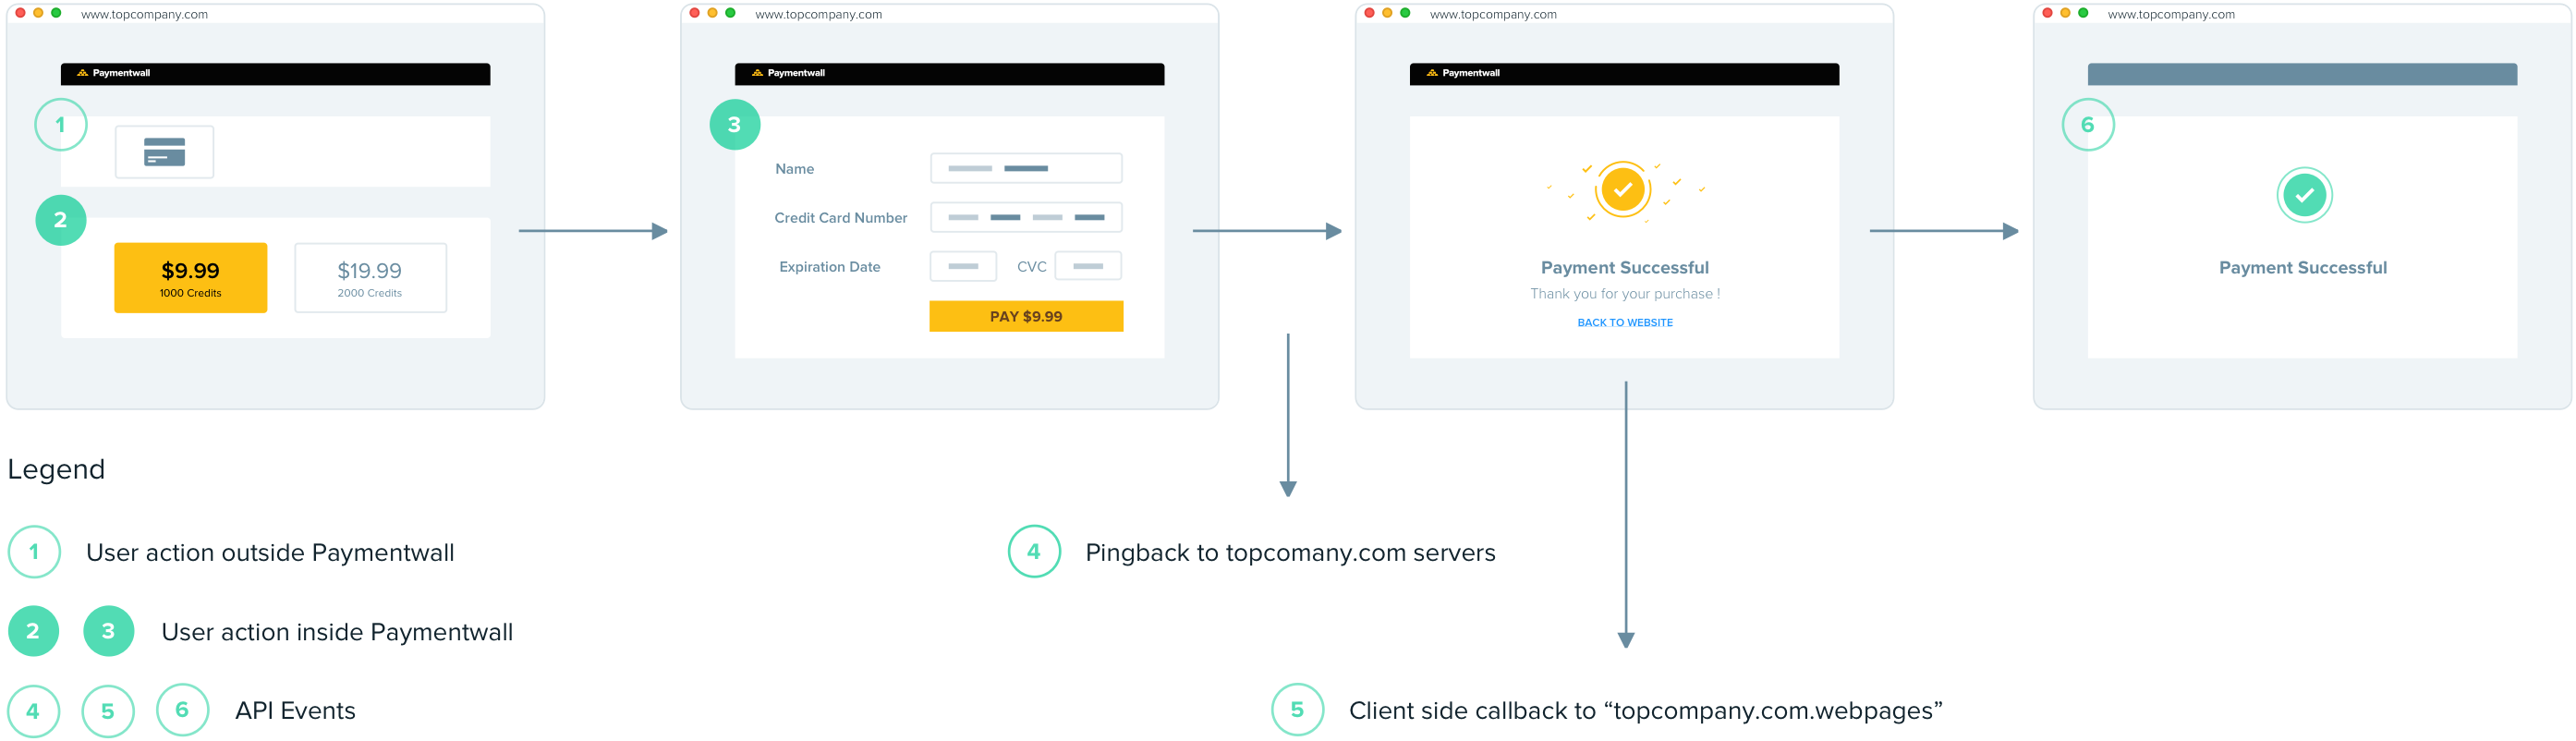
The value to be passed in ps parameter can be found in Payment System Shortcodes reference or dynamically via Payment Systems API.
Displaying a Widget
You can direct users to a Widget in a few ways:
- Embed as an iframe inside of your website.
- Embed as a webview inside of your mobile application. See Mobile SDKs.
- Redirect as a standalone page.
Please select the API type for instructions relevant to your use case (Digital Goods or Virtual Currency).
Payment Methods
Payment methods which are displayed on the widget depends on the user’s IP address and configuration of the Payment Systems in your project. For each project, you can make adjustments on the activated payment methods and their country coverage at Payment System section in My Projects depending on your business needs.
Refer to payment methods for the payment methods supported by Widget API in each country.
Pingback Payment Notifications
Once a user makes a payment with the payment method and the product they choose, we will notify your server using server-side Pingback.
Success Page
Once a user makes a payment, they will be redirected to the Success page, which you can pass via success_url API parameter.
Client-side callback
Additionally, if Terminal3 Payments Widget is embedded via iframe, it will send a client-side callback, that can be received with JavaScript.
To enable client side callback, please contact to devsupport@paymentwall.com with your Terminal3 Payments account email address.
Choose the API type
Choose the API type which will better fit your application.
- Digital Goods. Any game or website that has in-game virtual items, digital contents, full version of a game or software, Saas, and any one-time payment products.
- Virtual Currency. Any game or website that has Gold, Rubies, Gems, Rupees, Emeralds, Credits and any other virtual currency economy.
- Offerwall. Offerwall allows users to get Virtual Currency for free without making payments. This works well for games and other applications that have virtual currency economy.